Showing posts with label DIY. Show all posts

Wednesday, June 24, 2015

Wedding Card Dresser: Before and After


This dresser... ugh. I love it. It is my favourite piece of furniture that I have ever worked on. I cannot wait to actually use it when we get a larger house that has room for it. Anyways, here is the story on how it came to be;

My brother had this old dresser wasting away in his garage, I believe it was my mom's growing up. So when it came time to start the decor DIY for the wedding, I knew I wanted to refinish this dresser with some beautiful knobs i previously found at Marshalls and Winners. I wasn't initially sure what I was going to use it as, but I knew I needed to use it. Eventually the plan evolved and the dresser found it's place being my card box/ guest book table all in one.


DIY Oreo Pops

As a continuation of my DIY wedding desserts, after I mastered cake pops, I figured Oreo Pops would be a breeze..and I was right. Here is how I did them:


Items Needed
Double Stuff Oreos (it is soooo much easier with Double Stuff)
Misc Sprinkles
Candy Melts
Cooking oil, I am sure any kind will do
Lollipop sticks
Aluminum Foil

Directions
  1. Twist all of the Oreos to hopefully have one side with nothing and one side with all of the stuffing.
  2. Melt a cup full of your candy melts. It is best to do this 30 seconds at a time in the microwave on half-power.
  3. Put a plateful of the stuffing halves of the Oreos in the microwave and quickly until the stuffing is somewhat softened
  4. Take a lollipop stick and dip about 2 cm of the tip into the melted candy melts, then stick into the stuffing side of the Oreo. Place the other half of the Oreo back on and put a bit of pressure to ensure it mushes together. Do them all at once, giving the sticks drying time.
  5. After the sticks are done, melt a larger amount of candy melts, I found a very shallow container works the best. Add about half a teaspoon of oil in it and mix. This thins out the melt and makes it easier to dip.
  6. Dip your pops into the melt with the Oreo laying horizontally, go half way in, and hold the pop over the cup for several seconds, tapping it a few times to get all of the excess melt off.
  7. Add desired sprinkles/decoration.
  8. Lay the pop with the undipped side down to dry.
  9. Once the side that was dipped is dry, repeat to dip the opposite side.

Freezing - I make my pops in 2 separate batches, months apart and froze both. To freeze, I placed 2 pops in a sandwich ziploc bag, then filled up a freezer ziploc bag with as many sandwich bags that would fit. All thawed beautifully, no issues.


DIY Cake Pops

By no means am I a master at anything nearly close to cooking or baking, I merely manage to get by with a decent shred of dignity. My mother is the master that is all food making activities. Which means genetically I have a chance!

One thing I have successfully conquered is the sacred art of Cake Pops.

On June 20th, we had our wedding in my hometown and invited nearly 240 guests. We have too many friends, should have cut some pre-engagement (jk...kinda). my ultimate goal was to DIY the sh!t outta that wedding and make it the most amazing dirt cheap wedding ever. My goal budget was $10,000, which is pretty thin for 240 guests. But i just purchased a new-used SUV for $17,000 and i will get many happy years out of that chunk of change... this is one day. An important day, but no day should be worth more than a car. Many times me and my fiance sat in shock anytime we heard of our friends spending anywhere from $20-30,000 on their own weddings. Just. No.

One of my diy tasks was dessert. The cakes I left to my mother, but the cake pops and oreo pops were all mine. Here is how I tackled them:


Items Needed
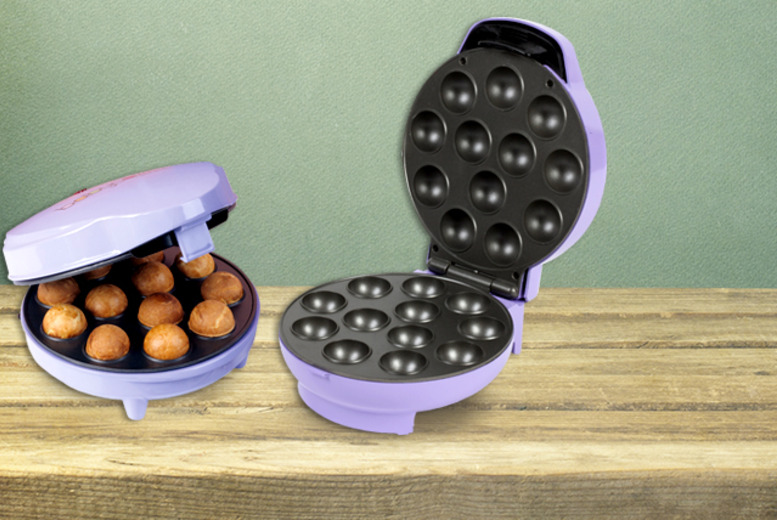
A mini cake pop maker (I used 2 to speed up the process)
Misc Sprinkles
A Box of Cake Mix, any flavour (and needed ingredients)
Candy Melts
Cooking oil, I am sure any kind will do
Lollipop sticks
A container to dip into
Floral foam (or styrofoam)
Squeeze bottle


Directions


  1. Plug in your cake pop maker and let it warm up, follow the device's instructions
  2. Mix up cake mix batter exactly as shown on the box as if you were making the cake.
  3. Pour batter into a squeezable container like an empty ketchup bottle or a pancake bottle... this makes the process cleaner and easier than using a spoon to drop the batter
  4. Squeeze batter into each hole on the maker until that half is totally full. Some may need a tad less. Every batter is different so it may take a couple of rounds to figure out your batter.
  5. Let 'bake' for about 5 minutes, remove from maker and place onto flat surface... dont stack them..they may not turn out round if you do.
  6. Once you are done baking all of your balls and have used up your batter, melt a cup full of your candy melts. It is best to do this 30 seconds at a time in the microwave on half-power.
  7. Once melted, take lollipop stick and dip about 2 cm of the tip into the melted candy melts, then stick into the cake pop. Do them all at once, giving the sticks drying time.
  8. After the sticks are done, melt a larger amount of candy melts, I found a narrow, but tall cup works the best - less waste. Add about half a teaspoon of oil in it and mix. This thins out the melt and makes it easier to dip.
  9. Dip your pops into the melt, go all the way in, and hold the pop over the cup for several seconds, tapping it a few times to get all of the excess melt off.
  10. Add desired sprinkles/decoration.
  11. Stick the pop into a foam so it will dry standing up. This way, you get no flat sides.

Freezing - I make my pops in 2 separate batches, months apart and froze both. If you will be freezing them, replace half of the oil in the cake mix recipe with applesauce. To freeze, I placed 2 pops in a sandwich ziploc bag, then filled up a freezer ziploc bag with as many sandwich bags that would fit. All thawed beautifully, no issues.


I don't have a picture of the cake pops at the wedding, but here is the finished product of the dessert table.

Monday, November 17, 2014

DIY Kitchen Makeover

The kitchen in our house was probably the main selling feature for us when we purchased it. It is a great size, had tons of pull-out drawers (I don't think I could ever go back to door-type bottoms again in a kitchen...just, no.) and the island is HUGE.

The only pet peeve of mine...that awful 90's oak. Ok, maybe awful is a tad strong. But for someone who loves diy projects and home decorating as much as I do, they have been a pain in my side forever.

I finally nagged the fiancé to trust me to paint them while he was away on a 3 week stint for work. And I absolutely love the result. My only regret is that I didn't do them sooner.

Granted, I do have to go back and put another coat on, do some touch ups, and complete the insides.

Here is the final product:


I used a white paint in the Diamond level from Dulux Paints and a generic primer.
I switched between a roller and brush.

Really I would love to give you some magical tips...but it is just being patient and doing a detailed job.

Wednesday, November 21, 2012

My BarnBoard Obsession

I am guilty as Sin! I am in love with Barnboard and it is near impossible for me to fight the urge to conger up some sort of Barnboard project in my new house. Im thinking the wall behind my bed, or at minimum make a headboard.

These are some inspirations for the project:

Tuesday, January 17, 2012

Dirt Road Decor: Lemon Walpaper Night Stand

This is one of my new more exciting (well, for me anyways) pieces. I finally braved the world of ModPodge! Well, since 6th grade art class, that is. This piece was given to me and I can't help but feel bored of my standard new paint, new hardware upcycles. I've been adoring many of these creative ModPodge creations on some of my fav sites for a while now and decided to give it a shot. 

I picked up a can of spray adhesive and Modpodge from Wal-Mart, as well as a "trial size" can of Slicker Yellow paint. (I find the $5 trial size to be the perfect amount for these night stands). The wrapping paper was previously bought at Winners to wrap my parents Anniversary gift, so that we'll count as freeeeeee!


I was a tad nervous about the wrapping paper part. To be honest (lesbihonest!...sorry, J.Shore quote :S ) I painted the top drawer Yellow and almost chickened out with the idea. But well, why not! It took perfectionist me 3 applications and rip it all off's before I was totally satisfied. The spray adhesive made the paper wet, so I was getting air bubbles in it. Oh well, lessons learned.


I'm super happy with the result! Definately not the last project of its kind I'll be attempting.

Monday, December 12, 2011

A DirtRoad Christmas


Here are a few DIY Christmas Decor Ideas I found on a few of my favourite blogs. Its a lil too late for this year, but I am definately going to give a few of these a try next year!

Thursday, December 1, 2011

Dirt Road Decor: $7 White Octagon End Table

This is by far my favourite piece I have done yet. And it cost a grand total of a Whopping $7.00!! The table was a $5.00 find from Goodwill and a $2.00 can of White paint from Wal-Mart, and boom! my new end table.


Yeah, so pretty before, eh? I should have just left it as is....

And check the lamp. A Gordman's find on my last Grand Forks trip. Took me over a year to find the perfect lamps. You cant see it in the pic, but there is a great pattern embroidered into the white lamp shade. It all looks super chic together!

Thursday, October 20, 2011

Jewellery Holder Upcycle Ideas

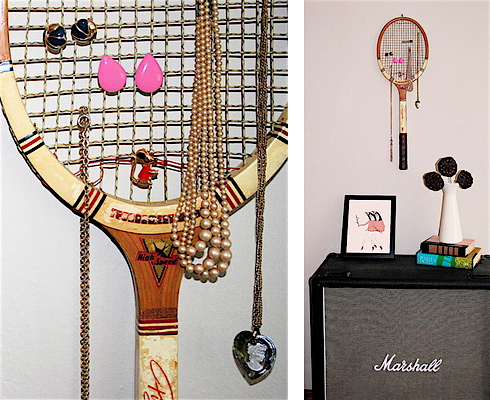
This is a small post, but I came across a couple new ideas for jewellery holders that I missed out on when doing my older post on the subject. Aaaand I think these are my new favourites!

Credit - Shelterness

Credit - Funky Junk Interiors


Credit - Too Much Time on My Hands

Wednesday, October 5, 2011

Dirt Road Decor: Real Teal nightstand

This is a lil $10 Thrift Store find that was, for lack of a better term, ass ugly, so I needed to rescue it and use up the rest of my Real teal paint, and grad some new hardware and voila!


Dirt Road Decor: Red and White Dresser

My bedroom dresser has been painted over and over and over and over and...... well, you get the idea. My 2 year life plan involves a king-sized bed, a brand new bedroom set...and a house with a bedroom big enough for this.

Anyways, so i figured since this dresser is 324 years old and has 76 layers of paint already on it (which includes pink, purple, white, navy blue, black and grey all in my lifespan with it), what does one more layer hurt?

So, here is the result...and some fancy new drawer hardware too!


Thursday, September 8, 2011

All Blinged out!

Jewelry CAN be a girl's best friend....if its expensive (kidding...?) and you have a good storage system for it. Jewelry boxes don't fly with me. I don't like the look and if it's outta sight, it's outta mind. Here are a few cute alternative ideas for storing your accessories.


This is what I have, I picked up a black version of this cute peice at Jysk a few months ago and love love love it. Most jewelry holders are awkward looking or in the form of a box of some-sort. That wasn't workin for this girl.

Plus, I love the modern-outdoorsy look.

Credit - designbuzz


I like this idea, but it looks like it might take more precision than you would first think. Tying up little wire is never easy. This may come AFTER I try one of the picture frame holders seen below...

Clink the link for a tutorial though!

credit - RealSimple


Cute!! Especially for a little girl's room.

Credit - recycledcrafts


I am DEFINATELY
going to try this at home!

Credit - bibliobags


This is another take on the above, and I like this one alot more to be honest, maybe its the purple being pulled from the back wall to match it up, or the modern effect of the silver hooks...

credit - danipatrice